I was having some trouble debugging CTC interrupts with CSpect, and so I needed to do some debugging on real hardware. In my head I thought this would be a difficult task, but Robin Verhagen-Guest (7fff) had posted a guide to creating a cable on discord, which he’s given me kind permission to paraphrase here, so here we go.
We need 3 things + a soldering iron to do this:
1. A USB -> RS232 adapter, use the 6 wire versions, labelled FTDI, https://www.amazon.co.uk/gp/product/B07JHNLLC3/ref=ppx_yo_dt_b_asin_title_o05_s00?ie=UTF8&psc=1
2. A DE9 Breakout adapter: https://www.amazon.co.uk/gp/product/B09LXWKTWH/ref=ppx_yo_dt_b_asin_title_o01_s00?ie=UTF8&psc=1 (when using this make sure to select the female – amazon has the wrong pictures on some of them!)
3. 1n5818 schottky diode – I bought a pack as I have a few unstarted electronics projects:
https://www.amazon.co.uk/gp/product/B08778SMJP/ref=ppx_yo_dt_b_asin_title_o04_s01?ie=UTF8&psc=1
Once you have the parts follow the following steps:
1. Get the rubber piece like this:
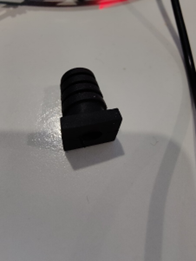
from the breakout adapter packet and thread it onto the wire of the RS232 adapter.
2. Solder a Schottky 1n5818 diode onto the orange wire (PC TX) with the printed band on it being the end that is joined to the wire.

3. Open up the breakout connector and connect Yellow (PC RX) to pin 7, Black to pin 8,and the other end of the Schottky diode to pin 9. Cut off the unused wires to prevent shorts and reassemble the breakout adapter being careful to make sure that nothing can short out.
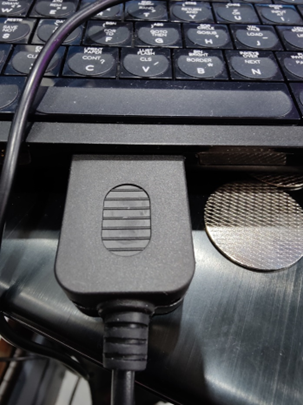
So now we need to plug the cable in and test that is working as expected.
This walk through assumes cor 3.1.10
Go into next basic and do this:
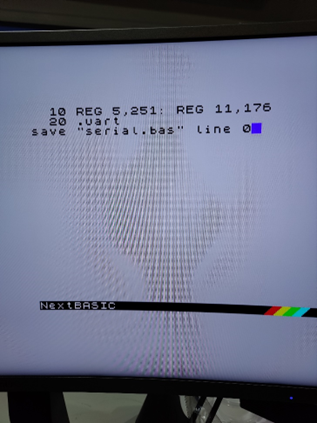
Save it and now you can obviously run it from the File browser on the front end which is useful in case you need to do it again.
Now install a program called termite from this page:https://www.compuphase.com/software_termite.htm
Set it to 115200 baud, 8n1, no handshake, and set 115200 baud on the speccy if it isn’t already then this should happen when you type messages on pc or speccy. If it doesnt – find me or another person who’s had it working on facebook discord or wherever else and ask for help. It’s almost certainly something silly,
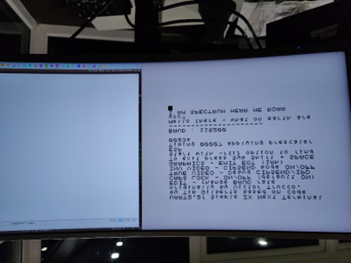
So now you have a speccy and a PC that can communicate.
So now to the software side. There is a fantastic piece of software called dezog by Maziac, who has several bits of z80 targeted goodness for VSCode. So if you’re reading this hopefully you already have VSCode and SJASMPlus installed, probably along with CSpect. If not:
https://code.visualstudio.com/ will get you vscode, https://github.com/z00m128/sjasmplus/releases/ will get you SJASMPlus
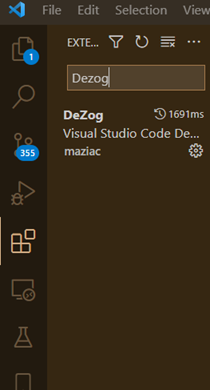
Search in the extensions tab in VSCode and you can find and install Dezog.
If anyone wants help getting a setup running beyond this check out patricia’s tutorial on luckyredfish.com as she shows how to get this working pretty well. You can always ask me too 😊
So, in VSCode I’ve edited my launch.json file to add a new config in addition to the cspect one that’s already there:
   {
            "type": "dezog",
            "request": "launch",
            "name": "Z80 Debugger Serial ",
            "remoteType": "zxnext",
             "zxnext":
             {
                 "serial": "COM3"
             },

            "rootFolder": "${workspaceFolder}",
            "sjasmplus": [
                {
                    "srcDirs": [
                        "Source/"
                    ],
                    "path": "Output/TestHarness.sld",
                    "mainFile": "Source/TestHarness.asm",
                    //"useFiles": true
                }
            ],
            "commandsAfterLaunch": [
                "-logpoint enable",
                "-assertion enable"
            ],

            "history": {
                "reverseDebugInstructionCount": 10000,
                "codeCoverageEnabled": true
            },

           "disassemblerArgs":
            {
                "esxdosRst": true
            },
            "load": "Output/TestHarness.nex",
            "startAutomatically": true
        }
I’ve also copied the new dezog version of the enNexMf.rom from here to machines/next on sd card
https://github.com/maziac/dezogif/blob/main/releases/core.03.01.10/enNextMf.rom
The documentation of dezog and sjasmplus on github are very informative. Worth a read if you want to know more.
Now we boot the next with the new file on the sd card. Everything should look normal until you hit the yellow button on the side. At this point you choose whichever joy port you’ve plugged your cable into. Mine was joy2 so number 2.
So now a video for the next section:
Thanks for reading through this. Please consider supporting the authors of these programs where possible!
Shooty Shooty
I’m currently working on a new game for the spectrum next – It’s at the early stages for now – but as you can see, the engine is just starting to take shape :